A Macrame hanging chair is a trendy and stylish addition to any home or outdoor space. Not only does it provide a comfortable and cozy seating option, but it also acts as a captivating focal point. In this tutorial, we will guide you through the steps needed to create your very own DIY Macrame hanging chair. Firstly, gather all the necessary materials. You will need a sturdy wooden dowel or branch, thick ropes or cords for the seat and backrest, and smaller cords for the intricate macrame knots. Additionally, grab a pair of scissors and a measuring tape to ensure accurate measurements. The next step is to measure and cut the seat and backrest cords.
Measure the desired height and width of your chair and multiply it by three to ensure enough cord length. Double the measurement for both the seat and backrest cords since they will be folded in half during the process. Once you have your cords ready, start by attaching the seat cords to the wooden dowel. Fold each cord in half and create a simple knot around the dowel, ensuring equal spacing between each cord. Continue this process until all the seat cords are securely attached. After securing the seat cords, it's time to move on to the backrest. Attach the backrest cords to the dowel using the same method as before, but this time, leave a bit of space between the seat cords and the backrest cords.
This space will be filled with the macrame knots later on. With the seat and backrest cords in place, it's time to start creating the macrame knots. Begin by selecting one cord from the seat and one cord from the backrest. Tie a square knot by crossing the left cord over the right one and then passing the right cord over the left one. Pull both cords tightly to secure the knot. Repeat this process with each pair of cords until you reach the desired length for the macrame pattern. Once you have completed the macrame knots, it's time to finish off the chair. You can add additional decorative knots or fringes to the bottom and sides for a personalized touch.
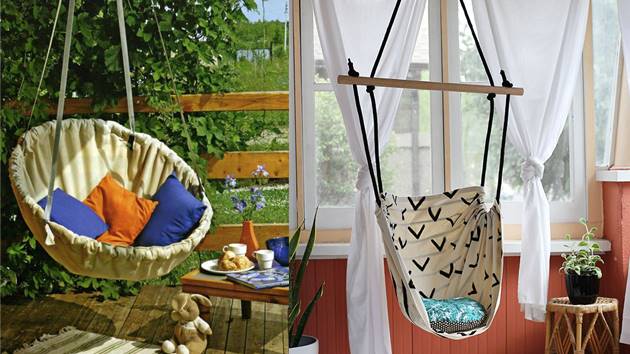
Trim any excess cord length and ensure that all knots are secure. Finally, hang your DIY Macrame hanging chair in your desired location. You can choose to hang it indoors, in a cozy corner of your living room, or outdoors on a porch or patio. Add some comfortable cushions and enjoy your new handmade creation. Creating your own DIY Macrame hanging chair is not only a fun and creative project but also a rewarding one. Not only will you have a unique and stylish piece of furniture, but you will also have the satisfaction of knowing that you made it yourself. So, grab your materials and get ready to create a cozy spot where you can relax and unwind in style.